
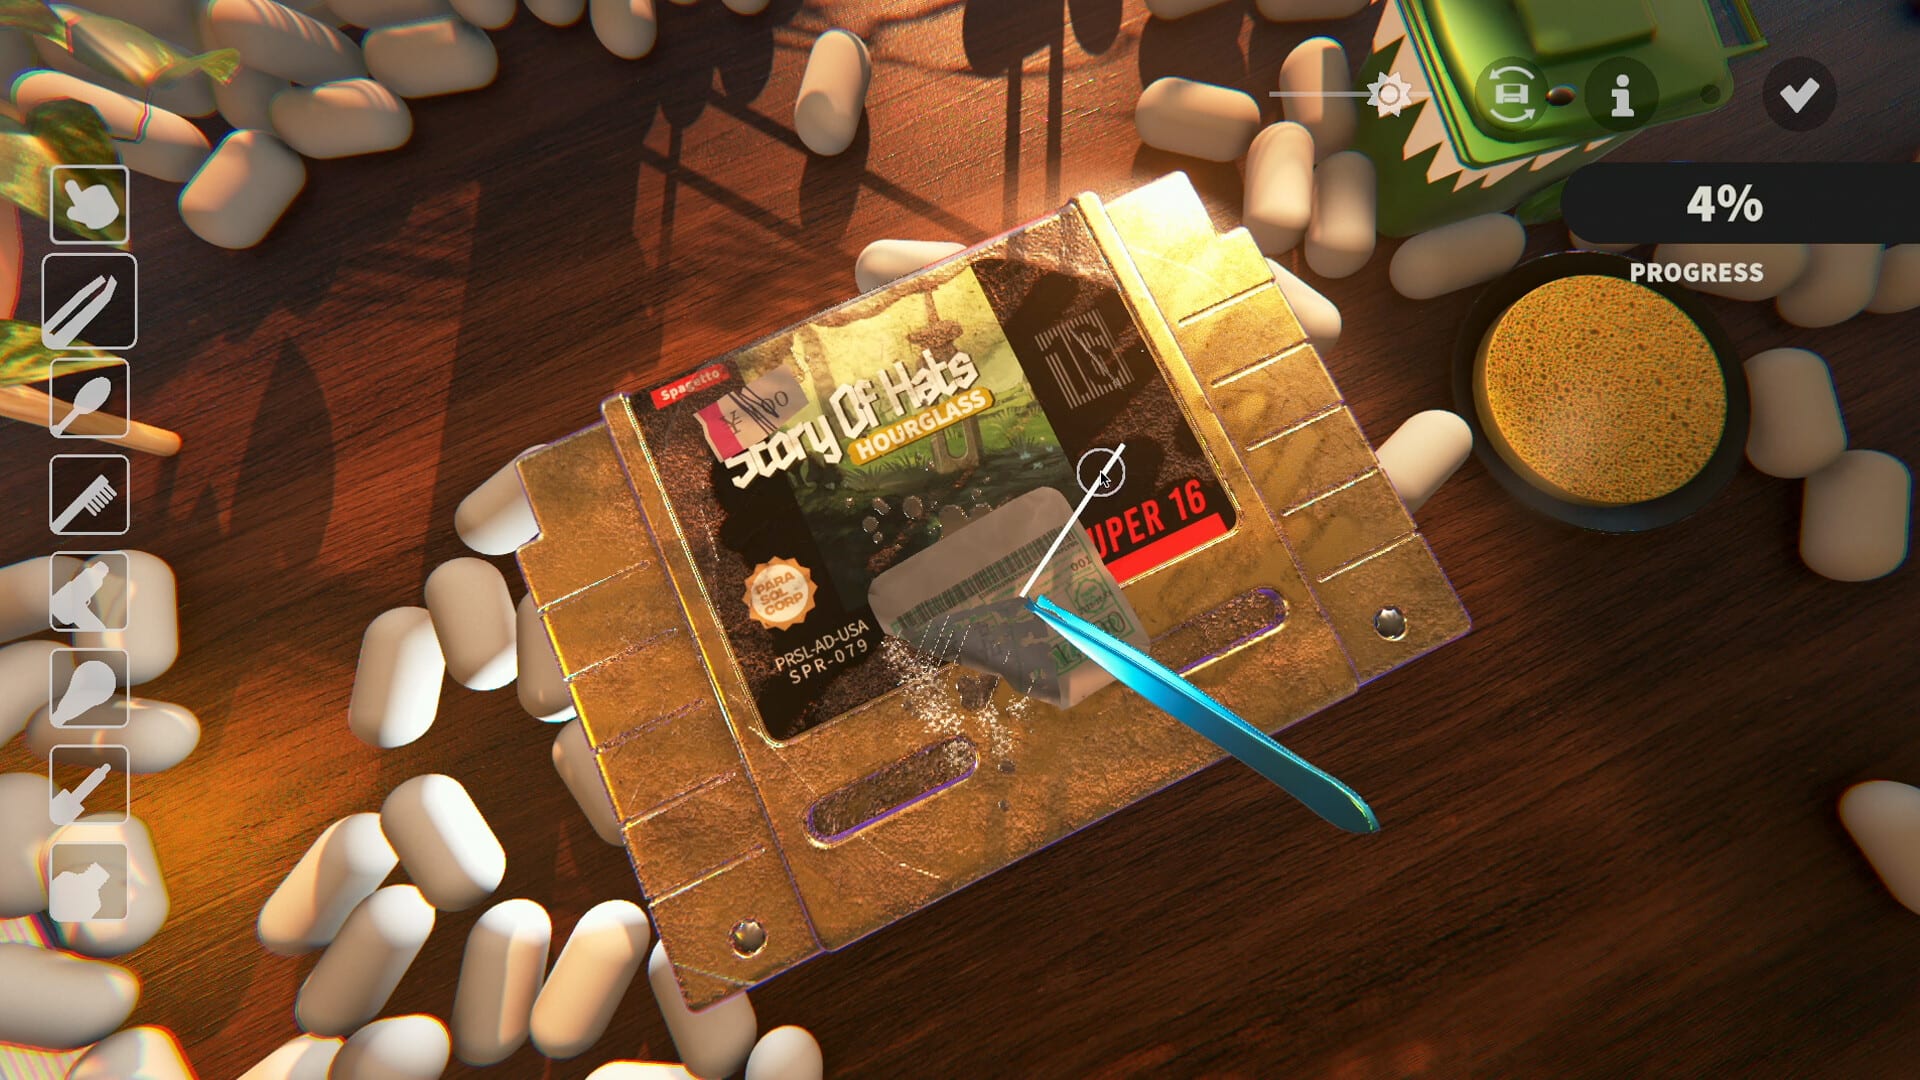
Official screenshot · Steam media gallery · © Parasol Corp. Material statement
Separate the sticker from the residue
The first useful distinction is whether you are looking at a sticker that is still attached or adhesive left after it has been removed. Tweezers handle the peeling stage, while the researched cleaning workflow uses Solvent for the sticky residue underneath. If the paper is already gone, repeatedly using the peeling tool does not address the same problem as treating the exposed glue.
This distinction matters because the game presents layered wear rather than a single dirt texture. A cartridge can have a sticker, ink, ordinary grime, and scratches in different places at the same time. Work on the category that remains instead of assuming that removing the most visible piece of paper finishes every part of that area.
Use heat before peeling when needed
The developer's June demo update explicitly added heating to make stickers easier to remove and leave less adhesive gunk. Use the in-game heating tool to prepare the sticker, then peel it with the appropriate tool. The source supports heat as assistance during removal, not a guarantee that the entire underlying surface will be clean afterward.
There is no verified universal heating duration or exact temperature in the research. That means a precise countdown would give the appearance of a tested technique without evidence to support it. Follow the in-game feedback and inspect the result, keeping the preventive heating step separate from the cleanup needed if adhesive remains.
Treat exposed adhesive with Solvent
Solvent is the named in-game treatment associated with adhesive and ink, while Polish is associated with scratches. Apply Solvent to the sticky area and work the treated residue with a cotton tip or brush. This is the observed game workflow described in the research, rather than a recommendation for using chemicals on real cartridges or discs.
Keep the treatment local to the problem you are trying to solve so that your next inspection has a clear purpose. If the mark persists, confirm that it is adhesive instead of a scratch or remaining sticker material. A stubborn-looking surface defect is not automatically proof that more Solvent is needed, because different layers use different treatments.
Check the cleaning equipment itself
Hands-on coverage reports that cotton tips and brushes can become dirty and spread grime again. If the area seems to smear while you clean, inspect your equipment before blaming the adhesive treatment. Cleaning the tool and returning to the patch can distinguish equipment maintenance from a genuinely unfinished layer on the object.
The sources do not establish a fixed replacement schedule or a required number of cleaning strokes. Use the condition of the equipment and the cartridge as the relevant feedback rather than inventing a routine based on elapsed time. For the broader kit, the tools guide explains how the cleaning implements differ from treatment bottles and inspection tools.
Find small patches with UV
The final-demo announcement describes a UV trail that remains briefly useful when you return to a mark with another tool. Use the torch to identify the unfinished patch, then clean that location with the treatment suited to the category. The torch reveals work; it does not remove glue merely by illuminating it.
Check other visible surfaces when the front looks clean but the job still appears incomplete. Randomized conditions mean that another cartridge may not carry residue in the same place as the last one. A targeted inspection is therefore more useful than copying a fixed movement pattern from an unrelated restoration.
Distinguish adhesive from scratches near completion
If the sticky area has cleared but progress still stalls, inspect the other categories instead of continuing to apply Solvent everywhere. Scratches are a separate layer and are associated with Polish in the researched tool mapping. The scratch guide covers that distinction and the demo changes that affected how disc scratches contribute to progress.
Demo Patch 6 makes this especially important because autocomplete checks each relevant layer rather than only the overall average. Dirt, ink, scratches, and stickers each need to meet the documented threshold, with the feature enabled in Accessibility. Glue cleanup can be successful even when a different unfinished category is the reason the entire job has not completed.
Keep the advice matched to your version
The research combines developer demo notes with hands-on descriptions, and the October demo changed several cleaning behaviors. A guide based on an earlier playtest may use informal product names or describe a difficulty that later patches addressed. Check your build before treating an old cleaning problem as a permanent property of the full game.
If residue behaves inconsistently, describe what remains after peeling and which treatment you applied rather than reporting only that the cartridge is dirty. Include the item, visible category, game version, and whether the problem appears on more than one object. That creates a clearer question for the official community without resorting to unverified fixes such as deleting a save.
Compare the before-and-after problem carefully
After peeling and treating a sticker area, compare the remaining mark with the category you were trying to clear. The practical question is whether adhesive remains, whether a scratch is now more visible, or whether dirty equipment has spread ordinary grime over the treated patch. Those possibilities follow from the documented layered system and do not require assuming that the original glue treatment failed.
A second inspection can also prevent an unnecessary change of approach near the end of the job. If the adhesive is gone but another category is still unfinished, continue with that category rather than adding more of the same product everywhere. The game distinguishes those layers, so the next useful action should be selected from what remains rather than from the first mark you happened to notice.
Use this workflow as a game reference
The tool names and sequence here refer to the simulator's mechanics and the observations summarized in its research dossier. They are not instructions for applying solvents, heat, or polish to an actual collectible cartridge or physical disc. Keeping that boundary explicit prevents a fictional cleaning treatment from being mistaken for real hardware-care advice.
For another in-game restoration, return to the same basic distinction between sticker removal, residue treatment, cleaning, and inspection. The object can vary without changing the need to identify the remaining layer first. If your version presents a different label or behavior, report that concrete difference rather than assuming an exact quantity or timing rule that this guide does not establish.
Sources and version notes
This guide synthesizes the research checked on November 4, 2026. Demo changes and preview observations are identified in the text; this site does not claim independent gameplay testing.
Found an outdated detail? Send a correction with the game version and the relevant source.