
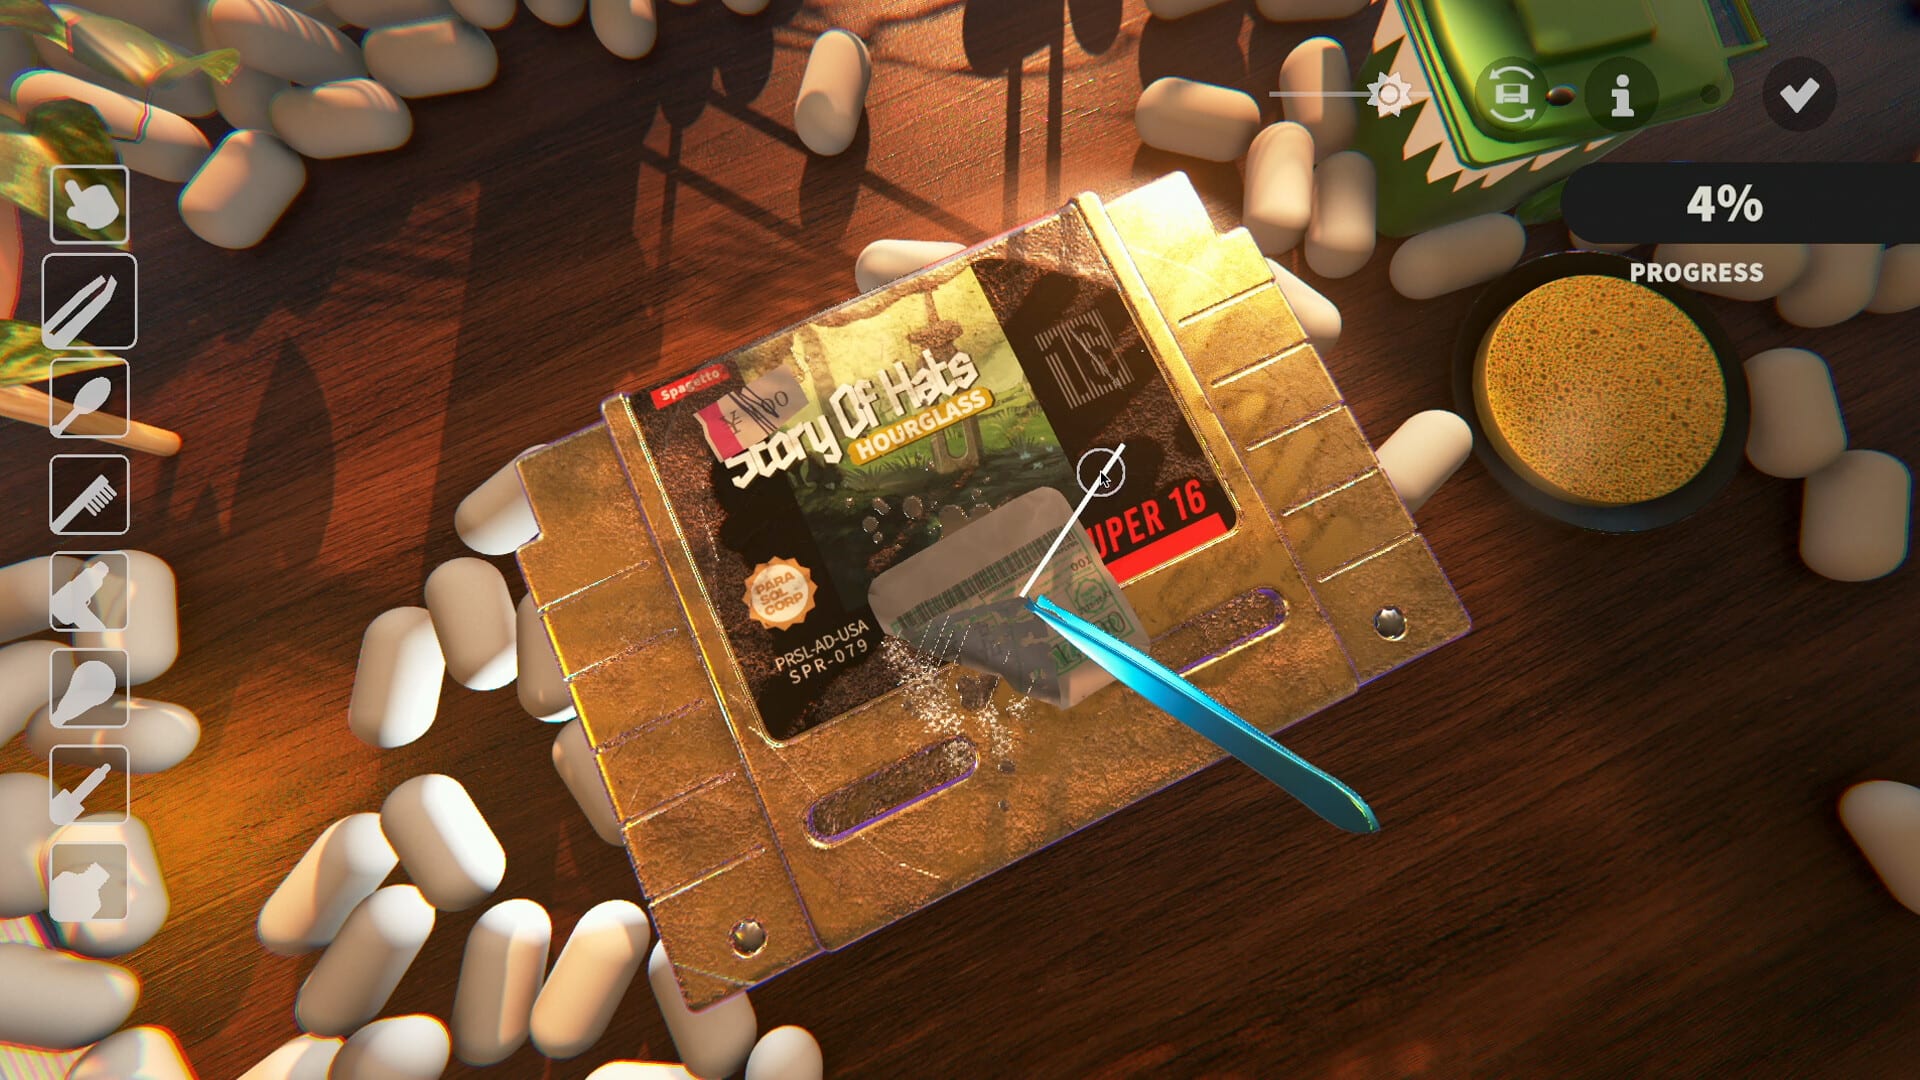
Official screenshot · Steam media gallery · © Parasol Corp. Material statement
Choose the tool for the remaining layer
A cartridge can carry several problems at once, so the tool that removes one mark may leave another untouched. The official description separates dust, ink, discoloration, stickers, scratches, and adhesive residue rather than treating every surface defect as ordinary dirt. Start by identifying the remaining category, then choose a treatment that matches that category instead of repeatedly sweeping the whole object.
This is especially useful near the end of a restoration, when the cartridge can look clean under normal lighting. A sticker may be gone while adhesive remains, and a dirty patch may disappear while scratches still affect completion. The tool choice should follow the unfinished work, which is why the 99 percent guide starts with inspection rather than a universal cleaning trick.
Tweezers and heat work together on stickers
Tweezers are the observed tool for peeling stickers, while the heating tool helps prepare the sticker for removal. The developer's June demo notes specifically describe heating stickers to make them easier to peel and reduce adhesive gunk. That establishes a useful sequence: warm the sticker, remove it, and then inspect the surface that was underneath it.
The important distinction is between preventing excess residue and removing residue that is already there. Heat can assist the peeling stage, but it does not establish that every sticker will leave a perfectly clean surface. If a sticky patch remains after the sticker lifts away, move to the glue removal workflow rather than continuing to pull at an absent sticker.
Solvent and Polish solve different problems
Solvent is the named treatment associated with ink and adhesive in the researched tool references. Polish is associated with scratches, which the game tracks separately from ordinary grime. Keeping those labels distinct avoids the confusion caused by older impressions that use a general word such as solvent for several different cleaning products.
Apply the appropriate in-game treatment and work the affected area with the cleaning equipment, checking the result before moving on. The available evidence does not establish a universal application amount, a fixed waiting period, or an exact number of passes for every cartridge. Treat the labels as a tool-to-problem reference, not as a tested recipe that guarantees identical results across every version.
Clean the cotton tip and toothbrush
The cotton tip and toothbrush are useful for working dirt and treated areas, but the tools themselves can get dirty. Hands-on reviewers report that dirty cleaning equipment can spread grime again instead of producing the result the player expects. If an area appears to smear while you work, check the condition of the equipment before assuming the game has stopped registering input.
This makes tool maintenance part of the restoration loop rather than a separate cosmetic detail. Inspect the object, clean the equipment when needed, and return to the relevant mark with the correct treatment. No specific cleaning interval is established in the research, so a rule such as cleaning the brush after a fixed number of strokes would add an unsupported requirement.
Use UV to inspect rather than erase
The UV torch helps reveal missed work; it is not itself a dirt-removal tool. The final-demo announcement also describes a lingering UV trail that helps players return to the marked area with the appropriate cleaning tool. Use that information to locate a problem, then switch back to the treatment that actually addresses the category.
Rotate or inspect the other surfaces when a mark is difficult to find, particularly if a nearly finished job is still registering scratches or ink. A clean-looking front is not enough to establish that every tracked layer has reached the required threshold. For the demo's exact autocomplete condition, check the patch-specific explanation rather than interpreting the overall percentage as a complete diagnosis.
Shelf arrangements can improve cleaning
The developer describes shelf-based traits that affect tool power and the area cleaned by a tool. One published example involves stacking puzzle games to obtain a greater cleaning surface area. This means the display collection has a mechanical role, and a tool that feels more effective may be benefiting from the way games are arranged in the room.
Before selling or moving a useful display item, consider the bonus it is helping provide. The research does not establish a complete multiplier table or a separate purchasable tool-level tree, so this guide does not invent either system. For the related trade-off between collection benefits and spending money, use the money guide alongside the tool reference.
A practical order for the next restoration
Start by opening the parcel and checking the cartridge's visible condition, then separate peeling, treatment, cleaning, and inspection into deliberate steps. The game is designed without a timer or fail state, so there is no need to turn that sequence into a speed challenge. A repeatable inspection routine is more useful than assuming every random cartridge will present the same marks in the same places.
When progress stalls, ask which part of the sequence is incomplete: a sticker still attached, residue left underneath it, scratches needing Polish, or a missed patch revealed by UV. That question narrows the next action without relying on invented unlocks or stronger-tool purchases. If the behavior differs from the documented demo, record the build and item before comparing it with older advice.
Read the result as a combination of tool and collection
When comparing your cleaning result with another player's, separate three things: the treatment being used, the condition of the cleaning implement, and the shelf effects active in that session. The researched game systems establish all three as relevant context, even though they do not supply a complete numerical comparison. A different-looking result is therefore not enough to prove that your tool is missing an upgrade or that the other player has installed a mod.
A useful next decision is small and specific: inspect the remaining layer, clean the implement if necessary, and return with the matching treatment. After that, check the category feedback again before changing another part of the workflow. This preserves a clear connection between the action and the observed result, without inventing an exact performance target that the supplied sources never measured.
The same distinction helps when asking for support about a tool that seems ineffective. Identify whether you mean peeling, removing treated marks, inspecting with UV, or benefiting from a shelf arrangement. Those are separate functions in the documented kit, so a question that names the function is easier to interpret than a general report that the tools do not work.
Sources and version notes
This guide synthesizes the research checked on November 4, 2026. Demo changes and preview observations are identified in the text; this site does not claim independent gameplay testing.
- Developer: sticker heating and UV information
- Developer: shelf bonuses and surface area
- SIFTER: hands-on review
- The Wand Report: hands-on review — review summarized in the research dossier
Found an outdated detail? Send a correction with the game version and the relevant source.